This
guide is for setting up any of the Xerox 4150 printers. I will use
firenze.admin.ucsb.edu as an example though. Replace firenze with the
name of the printer you are setting up.
The first thing you will need to do is go to
this xerox driver site
and cownload the drivers for your OS.
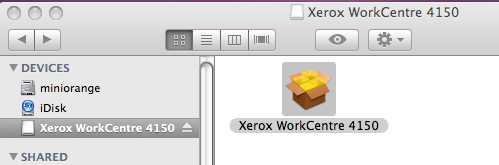
Once you have done that open finder and double click on the Xerox WorkCentre 4150 icon to start the install.
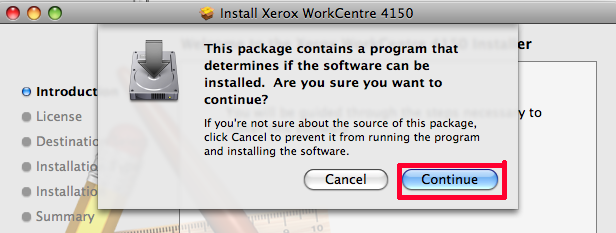
When the installer pops up and asks if you would like to continue click on the continue button.
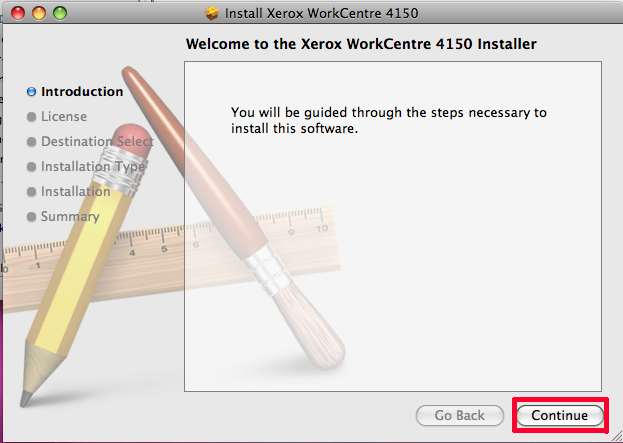
The next screen you see will ask you to continue through the guided install. Click on the Continue button to move to the next step.
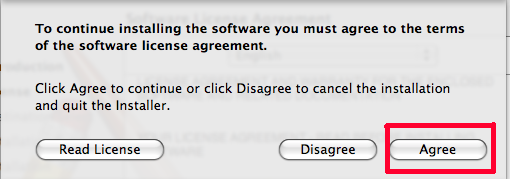
The next screen will show the license agreement screen. Click on the Continue button to move on to the next screen.
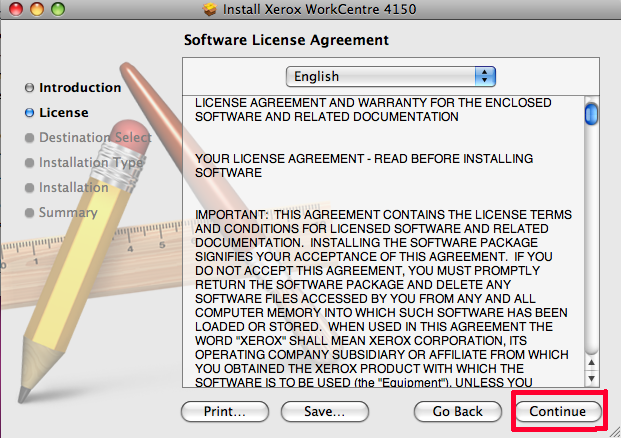
After clicking on the continue button a box will pop up asking you to agree to the license agreement. Click on the Agree button to continue to the next step.
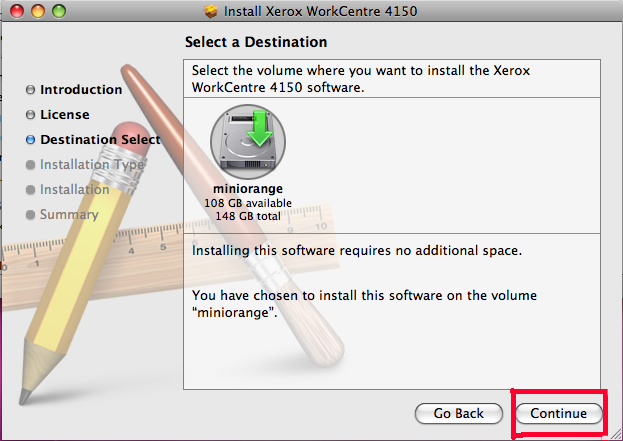
The next screen will ask you to select an destination drive, which is
where the drivers for the printer will be saved. Click on the picture
of your hard drive and click on the Continue button.
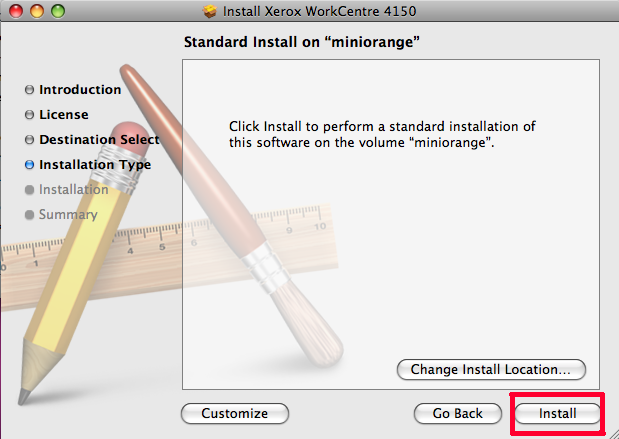
The next screen will have the install type which is typical by default. Hit the Install button to continue with the installation.
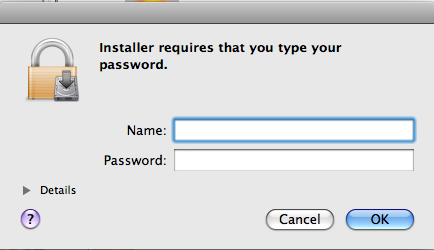
After clicking the install button a box will come up saying you need
administrative rights to add this printer. If you have administrator
rights type in your username and password in the correct boxes and hit
the Ok
after the install finishes you can close all the windows it has opened.
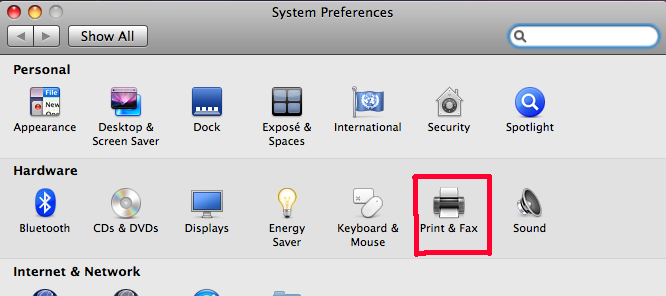
The next step is to open the system preferences windows and click on Print & Fax icon.
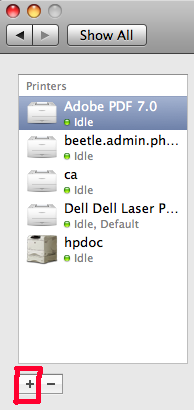
That will open a window that has a scrolling menu on the left hand side. Under that menu is a + which you need to click to add a new printer.
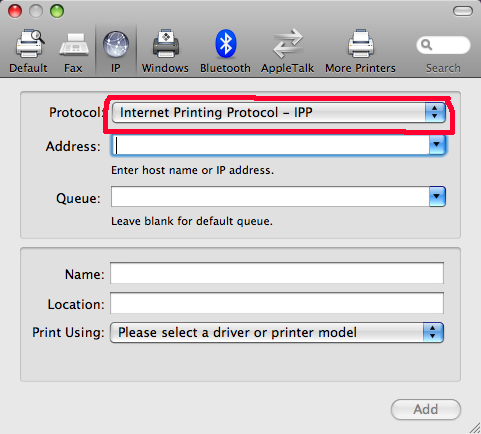
Make sure that Internet Printing Protocol - IPP is selected under the protocol drop down menu.
The next step is to fill in the address of the printer, so in this example it will be firenze.admin.physics.ucsb.edu
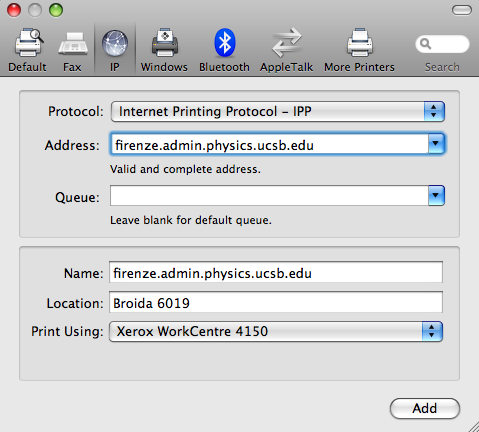
The name and location should be filled in automatically after the address has been entered.
In the next screen you will see the installable options. Make sure that trays 2-4 are installed as well as Basic Office Finisher and LAN fax and then click the Continue button.

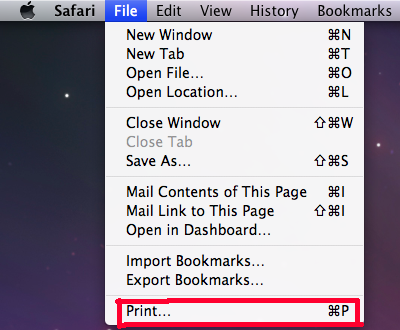
The next thing we need to do is set up the accounting system on the printer.
To do that open a safari window and click on the file tab and then click on Print
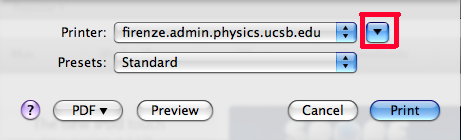
This will bring up a small box with basic printing options in it. We
need to click on the down arrow next to the printer menu though.
This will bring up the advanced printer options.
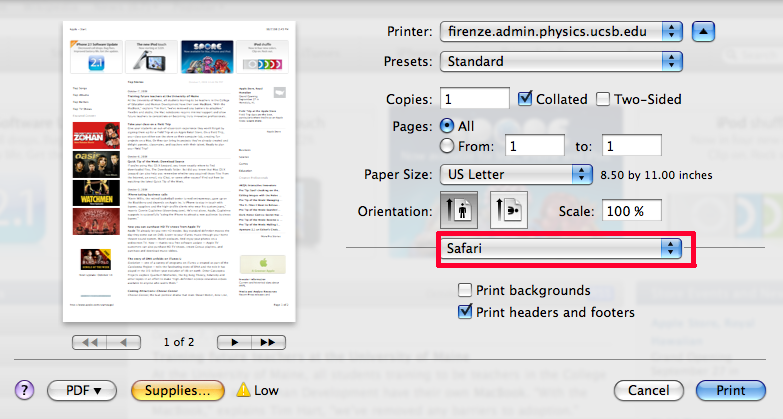
Click on the menu that says Safari to get a drop down menu of settings to change and click on Accounting.
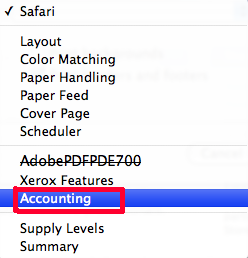
On the screen that comes up open the drop down menu under Accounting system and select Xerox Standard Accounting or Auditron
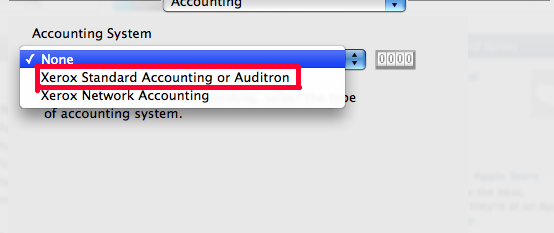
This will bring up a window that looks like this
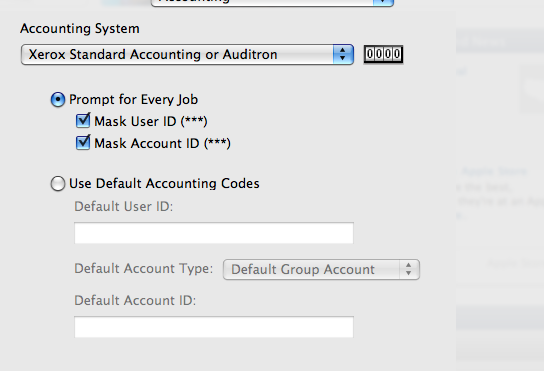
If you use more than one account ID then it is best to leave
the settings the way they are to ask you every time you print for the
information. You should call PCS to get the list of account ID's to match your user ID(copier code).
If you only have one user ID then click the Use Default Accounting Codes button and fill in the Default User ID with your copier code you use and leave the Default Account Type as Default Group Account.
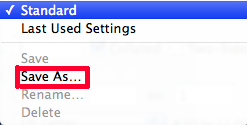
The next step is to save the settings so that you dont have to redo these settings everytime you print.
To do that click on the Presets drop down menu and click Save as and name it whatever you would like.
These are all the basic things you need to do to be able to use any of the Xerox Workcentre 4150 printers.
Now I'll show you some features that will optimize your use of these printers.
First I will show you how to print two-sided sheets.
In the menu where you selected Accounting last time you should select Xerox Features. The window should look like this after you select Paper and Output.
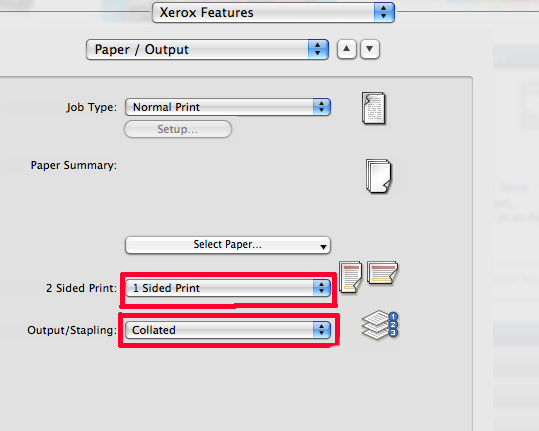
In the menu next to 2 sided print you can select either, 1 sided print, 2 sided print, or 2 sided print flip on short side.

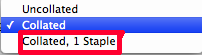
You can also have the printer staple for you by going to the menu next to Output/Stapling. There you get a menu that looks like this.
T