Sparkfun flashlight kit tutorial web page - explore
the different sections on the right-hand side of the page.
Adafruit soldering tutorial video
Adafruit desoldering tutorial video
Soldering is Easy comic by Altman, Nordgren, and Keyser
Plusivo soldering kit manual
Adafruit soldering preparation page
Adafruit good solder joint page
Adafruit common soldering problems page
Seeed Studio common soldering problems page - note that
nearly every picture on this page has been copied
from some other website. Nevertheless, it is a useful
collection.
Sparkfun soldering tutorial web page
MightyOhm Geiger Counter web page
MightyOhm assembly instructions
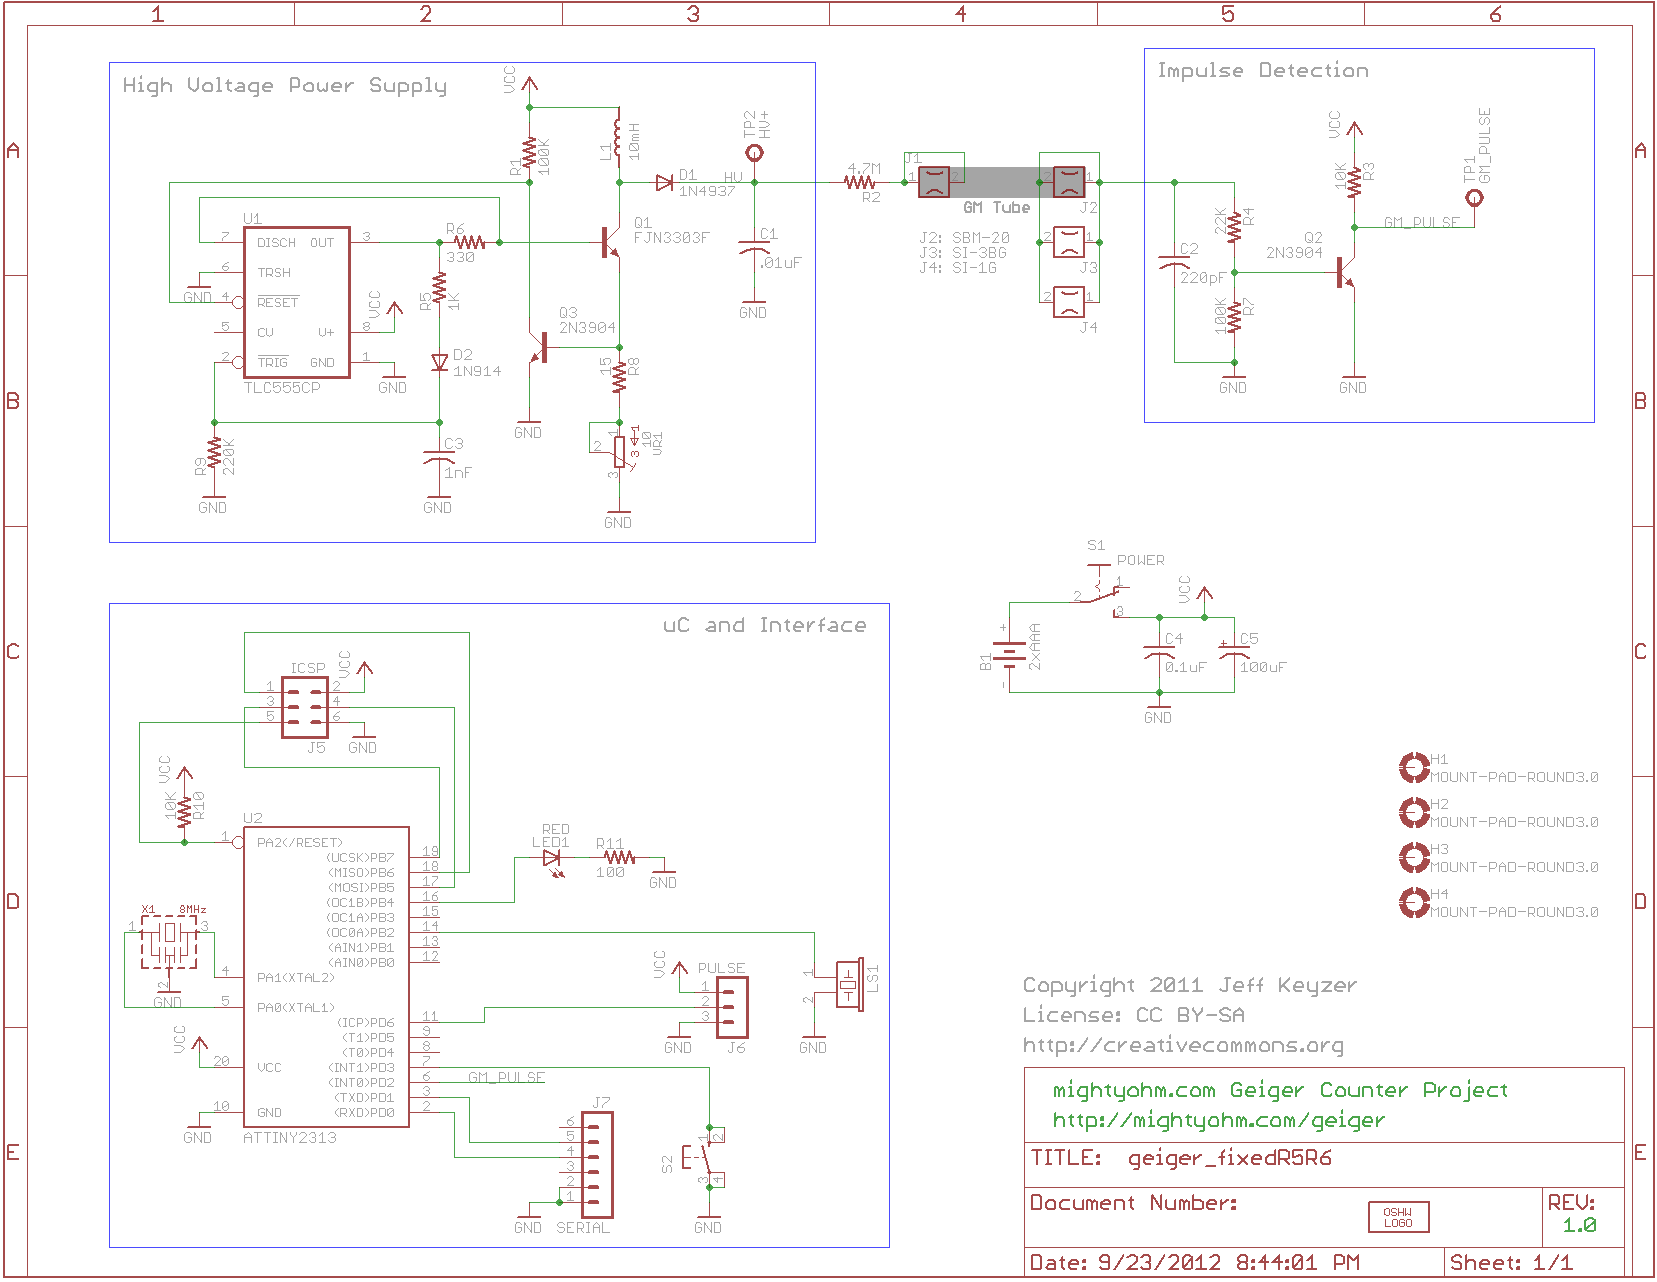
MightyOhm Geiger counter schematic diagram
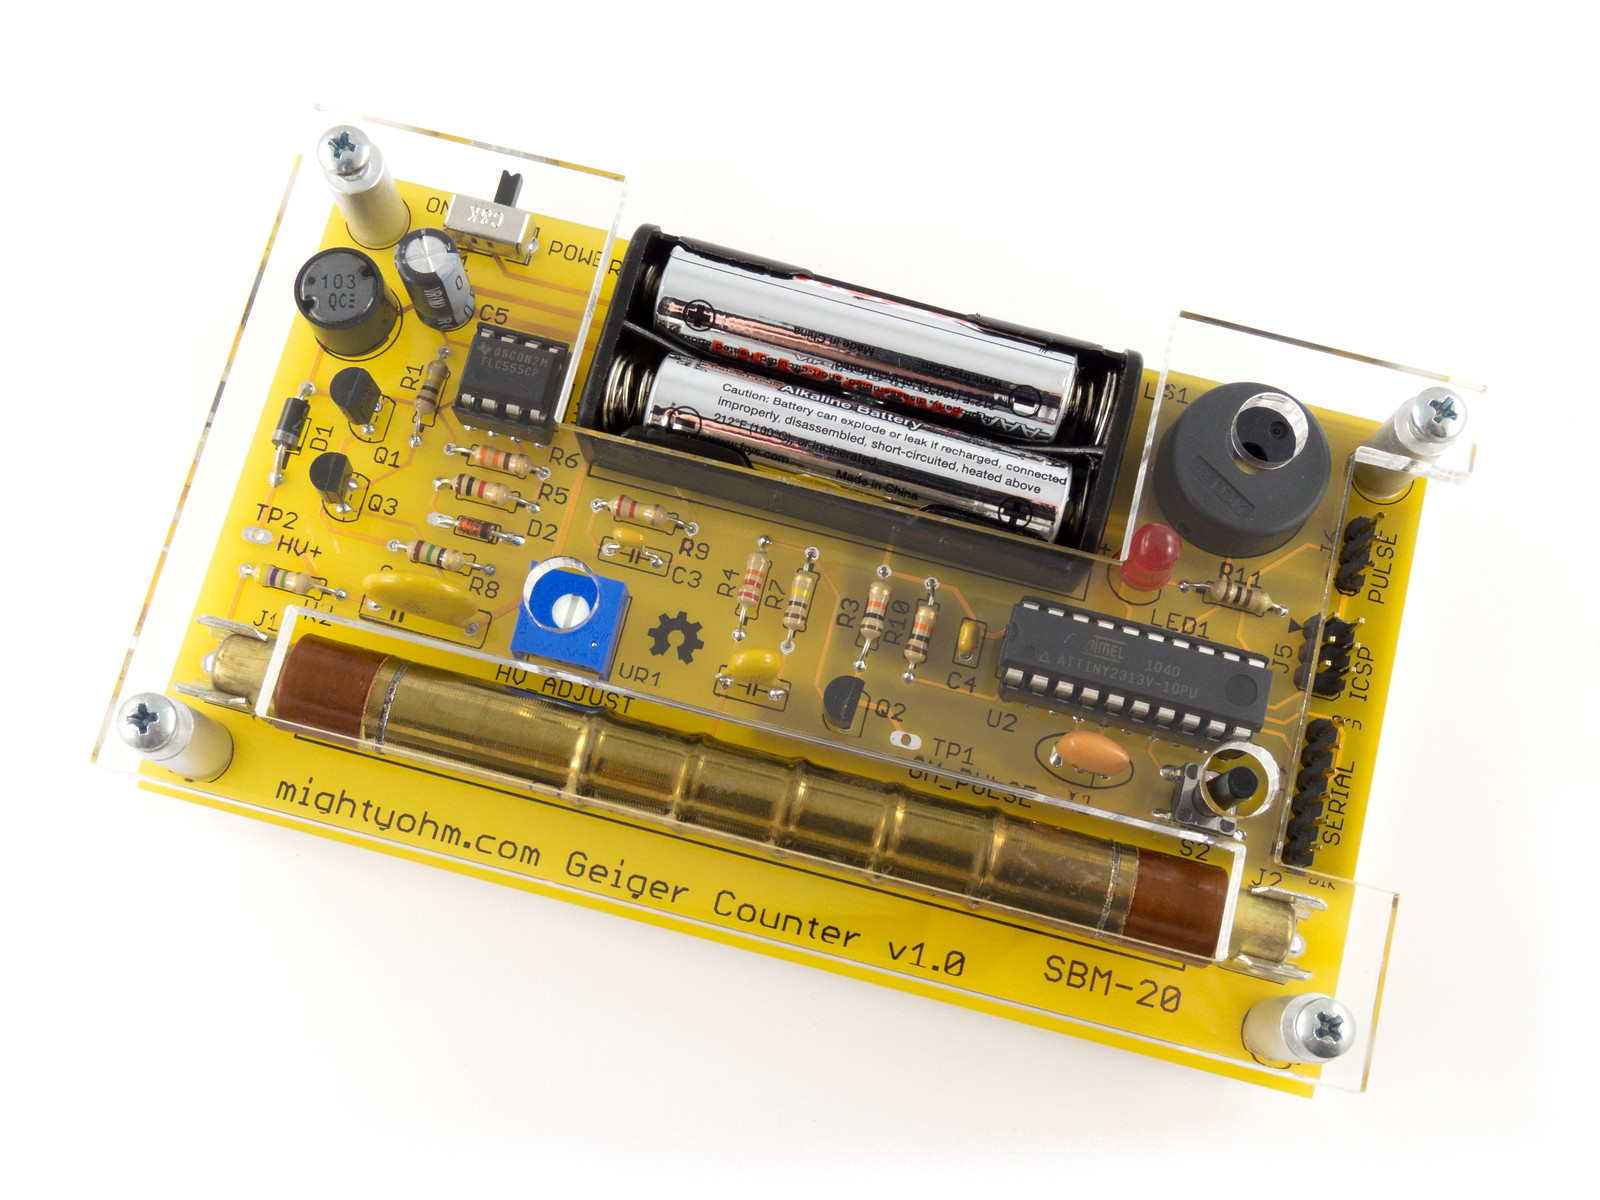
MightyOhm Geiger counter photo
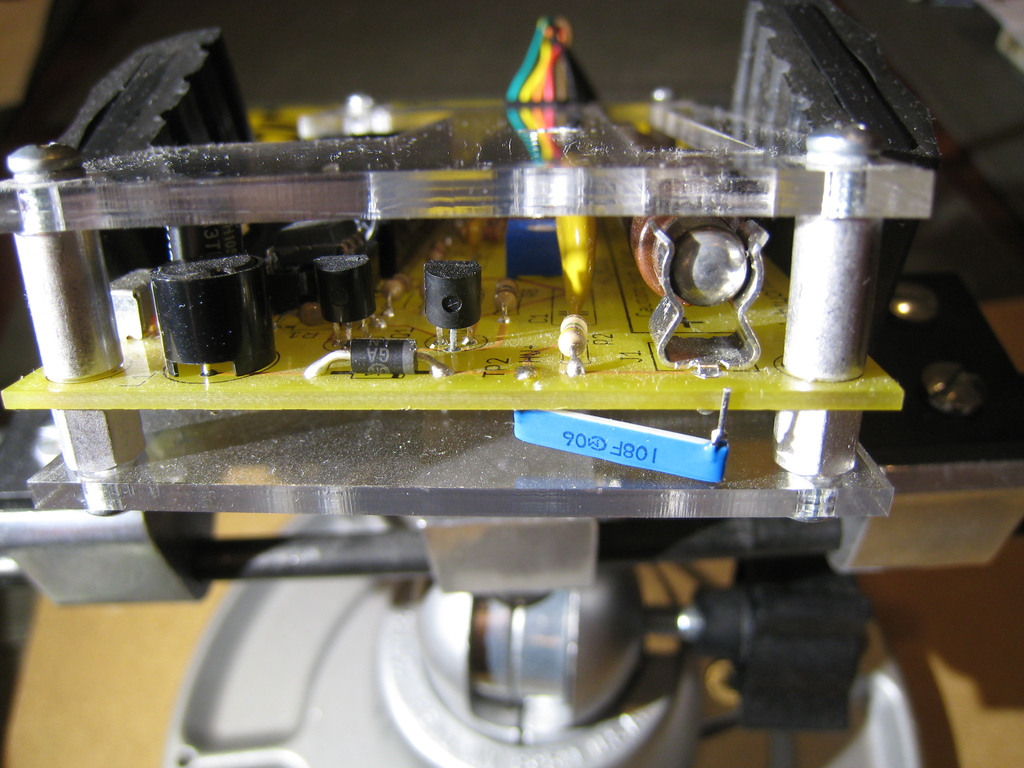
1 GΩ resistor photo
Tape the 1 GΩ resistor to your Geiger counter
board so that, as shown in the photo above, one lead
protrudes from below up through the “TP2 HV+” test point
connection, and the other lead rests on the edge of the
circuit board. Solder the protruding lead to the TP2 HV+
pad, let the connection cool, then remove the tape.